Friday, December 28, 2007

G9: The Sweet Aperture

.
Many devices have a “sweet spot”; that is, a place, operational mode or setting where the device works best. Sports provide some of the best examples: baseball bats, tennis racquets and golf clubs all have a sweet spot (even if I could rarely find it!). Machines are the same way. Long ago I learned that a automobile engine runs best under conditions corresponding to a highway speed of something like 45 miles per hour. Wonder if that is still true? Centrifugal pumps certainly have a sweet spot; it’s even called the Best Efficiency Point (BEP). Generally speaking, when additional information is not available, I assume that the sweet spot of any device is near the middle of its operating range. The end points of an operating range are typically compromises in some way or other.

The G9 aperture can be varied between f2.8 and f8. The sweet spot in this range is somewhere between f4 and f5. After a few tests, I’d say that the sweet aperture of my own G9 is about f4.5.

A simple test was set up as shown here with a ruler 
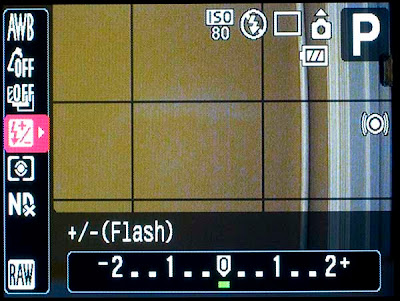
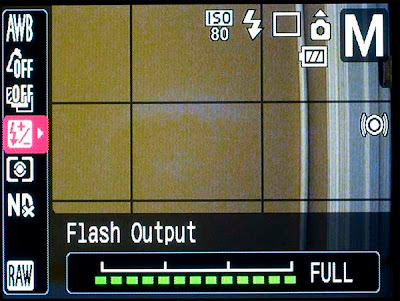
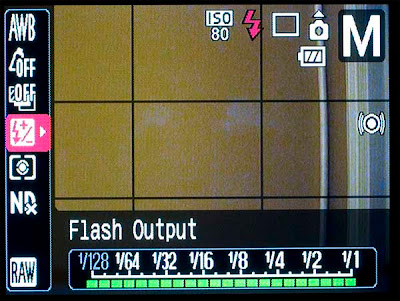
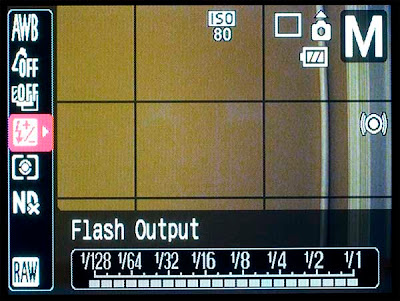
on a table in window light. The G9 was on a tripod, in Manual exposure mode, shooting raw + jpg at ISO 80 and set for the 2 second shutter delay to avoid camera shake. The coins were placed along the ruler for reference points. After determining the correct exposure, pictures were taken at various apertures (changing shutter speed to keep correct exposure). The focus was obtained automatically at the penny but I was concerned about the effects of focus so all tests were repeated using focus bracketing; however, this turned out to be unnecessary.

Here is a composite of the crops from the in-camera jpgs. Several things are going on here and all at the same time. The exposures vary a little bit and the outdoor window light also varied somewhat. As expected, depth of field increased as the aperture decreased (f-number increased). Some sort of in-camera sharpening, contrast, etc is being done as well. All these images look reasonable and about the same at first glance. Now click on the image to get the 100% crop view. Take a close look at the scale markings of the f4.5 variation at the penny. The scale graduations are in 1/64 inch and every graduation is visible. Two inches closer to the camera, near the nickel, the f5 version shows more detail and the f4 version shows the least detail. This is the effect of depth of field. The same effect should be seen near the dime at the 8 inch mark – the most detail in the f5 shot. But wait! The f5 shot is worse than the f4.5 shot. Notice that details of the graduations are visible out to about 7-32/64 on the f4.5 shot but only about 16/64 on the f4 and f5 shot. What is going on here?

Remember, I was shooting raw + jpg but taking the easy way out and using the in-camera jpg to draw conclusions. Time to examine the raw files. The raw files led to exactly the same conclusion: f4.5 is the sweet aperture for the G9. The raw files also revealed much more detail than the in-camera jpgs. In this composite (click for an enlargement), the f4.5 crop from raw (middle) reveals detail out to about the 8-8/64 inch mark. But notice that the f8 crop from raw (right) shows even less detail than the f4.5 crop from the in-camera jpg. In fact, the f8 crop from raw is noticably soft along the entire length. These are unexpected results except for the concept of the “sweet spot”.

What is the technical explanation for this sweet spot near f4.5 for the G9? The answer to this question appears to be related to the diffraction limit. I’m certainly no expert in diffraction but here are some handy links for a more detailed explanation and even some calculations.

Wikipedia has a detailed explanation of diffraction.

There is a good explanation of diffraction in digital photography and even a calculator to estimate the limiting aperture at http://www.cambridgeincolour.com/tutorials/digital-camera-sensor-size.htm.

In a final comparison, instead of the 100% pixel peeping monitor view, I made 8x10 sized, full frame matte prints on a Canon i9100 printer. Near the 8 inch mark, the 1/64 graduations are not detectable with the unaided eye from any of the variations! Even so, the f4.5 print from raw is obviously preferable to the others.

When the absolute maximum quality image is required, I’ll be tending to shoot my G9 at f4.5 but the larger and smaller apertures are still very useable – and I do drive faster (and slower) than 45 mph!

Note: Knowing I would be writing that raw revealed more details than jpg, and anticipating the grief that would come my way for doing so, I suddenly remembered that when the G9 is set for raw + jpg, the in-camera jpg is compressed at the “Fine” level whereas in pure jpg mode the “Super Fine” compression is available. I repeated the test shots in jpg only, using “Super Fine” compression mode. The results are the same: f4.5 is the sweet spot and raw reveals more detail than jpg; however, Super Fine compression does reveal slightly more detail than Fine compression. I believe that the difference in the raw and jpg shots is not “raw vs jpg” but is instead an indication of the in-camera noise reduction that is done on the in-camera jpg even at ISO 80. The raw file did not have any noise reduction applied. Should noise reduction have been applied to the raw files? Well, you were looking at 100% crops, would you apply noise reduction?

Sunday, December 23, 2007

Friday, December 21, 2007

G9 on SmugMug

I've set up a special album on SmugMug for my better G9 photos.

Doesn't it seem strange to group your work by the tool that was used? Even so, a G9 album is probably useful for the time being.

A word about selecting and showing your best photos: Once I attended a photo workshop in which the instructor was asking everyone "Why are you here?" My response was that I wanted to increase my "yield" of good photos. The instructor asked how many good photos I got per roll (right, this was in the days of film). I was embarrassed to say that I got about 3 good shots per roll of 36 exposures. The instructor then said, "I wish I could get three good shots per roll!" Later, during his slide show, I realized that I was not getting any good shots per roll!

So don't take my G9 album as an indication of what the G9 can do -- it's what *I* can do at this time. I hope your shots are better and that my own get better.

Wednesday, December 19, 2007

Of Hammers and Cameras


My dad had many hammers. Hammers large and small, short and long, wood, metal, fiberglass and plastic were scattered around his workshop: claw hammers, framing hammers, tack hammers, ball-peen hammers, a sledge hammer, various mallets, mauls, and hatchets. There was even an electric hammer, a nail gun that automatically focused just the right amount of energy on a special nail to drive it precisely into the wood. My dad did not collect hammers but he had many because he loved to make things, especially of wood.

It never occurred to me to ask my dad which hammer was his favorite. His hammers were tools; each had its own purpose and function. All the same, I knew that one hammer was special even though it was not the most specialized and certainly not the most expensive.

As a young boy learning to use a hammer, my dad would give me a handful of nails and a board. While he was doing his woodwork, I’d sit on the workshop floor and tap away, holding the hammer midway up the handle. Tap, tap, tap, taking dead aim with each tap. Hit the nail on the head. Tap, tap, tap. Time for a story and a lesson.

In the Depression, my dad was working at F. W. Woolworth’s – one of the original “five and dime” stores – when he got a better job at a shipyard. He had to provide his own hammer for the new job so he bought a claw hammer at Woolworth’s for fifty cents. That fifty cents represented a substantial part of his wages but also an investment in his future. On one of his first days at the shipyard, as he was using his new hammer, an older worker asked to see it. My dad proudly handed over his new hammer only to see his co-worker immediately saw off the bottom half of the handle. When my dad asked, “Why’d you do that?” his co-worker replied, “Well, you weren’t using the bottom part of the handle anyway!” Daddy was then told to take it to the repair shop and get a new handle – which he did. A lesson taught, learned, and taught again.

There are newer and perhaps better hammers than that five and dime Depression hammer. Computer designed and made of space age materials, a modern hammer is a model of efficiency as a striking tool. Some don’t even look like hammers. Modern hammers are variously engraved, marked and labeled promoting these features (not to even mention the safety warnings!). My dad’s old hammer is marked only “Drop Forged” but I feel certain it was “Made in the USA”.

As child, my goal was to learn to use that hammer correctly. I practiced. I drove nails, pulled them out, straightened them and drove them in again. I wasn’t making anything – just practicing using that hammer. Practice makes perfect.

No one ever asked my dad which hammer he used to build his workshop, make a roll top desk, frame a picture or fashion a cradle for his great-grandchildren. Of course, his answer would have been different in each case and would have always included “The right tool for the job”. So I learned that even though a tool might be selected on its own merits for a job, the favored becomes the favorite through years of generating a life’s work and the tales that embellish it.

My dad had more saws than hammers, but that’s another story.

I had eight hammers myself. Now I have nine but these days am more likely to be seen with a camera in my hand. Photography is my wood and I have, well, quite a few cameras to practice with. You never can tell when one might be needed and I certainly want to use the right tool for the job.


Sunday, December 16, 2007

G9 Display in Flash Mode

There are many ways to do flash photography with the Canon G9. I've given some examples here, here and here and will be giving more. As always, I recommend that you do as I do and follow Strobist for learning off-camera flash. Meanwhile, seeing the variation in the G9 flash display might help clear up some confusion.

With the G9 in Program mode, turn the built-in flash on, press the Function Set button and scroll down to the flash adjustments. The G9 display should look like this:


The idea here is that you can increase or decrease the flash effect as compared to what the G9 thinks it should have been. This adjustment is independent of the shutter speed or aperture selected by Program mode.

But if the G9 is in Manual exposure mode, the flash display looks like this:


In G9 Manual exposure mode, YOU control the amount of flash. It’s not difficult, take a trial shot and adjust the setting with the Control Dial. Unfortunately, the adjustments are limited to Full, 2/3 Full and 1/3 Full power.

With external flash mounted on the G9, the display looks different. Here’s the display with a Canon 580EX mounted in the hotshoe; again, the G9 is in Manual exposure mode:


With the 580EX mounted and the G9 in Manual exposure, you still must manually adjust the flash; however, you can turn down the flash to 1/64 power (and to 1/128 with the 580EX II). The display is the same whether the 580EX is in ETTL or its own manual mode. It seems easier to me to leave the 580EX in ETTL and make the adjustment on the G9. A nice touch is that even older Canon flashes like the 420EX and 380EX that do not have manual adjustments on the flash can be adjusted with the G9 just like the 580EX.

If a non-Canon flash is mounted, the G9 display looks as shown below:


The flash adjustments are grayed out and are not usable. You’ll have to adjust the non-Canon flash through its own on-flash adjustment (if any). This isn’t particularly difficult; I do it frequently with a Nikon SB-28 and SB-24.

And yes, that’s a door frame in my illustration photos! All photos of the G9 taken with the old faithful G3.

Saturday, December 15, 2007

G9 and Canon Multiple Flash

Woof-Woof is a bit of a lounge chair potato so why not practice flash photography on him? These two shots were taken at night – it’s a wonder he wasn’t asleep!


Here’s a basic bounce flash photo using the Canon 580EX on the G9. The G9 was set for ISO 80, Program mode. Exposure, selected by the G9, was 1/60 second at f3.5. (I’ve noticed that the G3, G9 and even the 20D seem to head towards max aperture in Program mode when a flash is attached.) Not too bad, although a bit flat, I’d say. Time to try a little directional lighting.

The Canon 580EX can control another compatible Canon flash – in this case, a 420EX. The 580EX was set on “master” and the 420EX on “slave”. The 580EX controls the relative amount of light that each flash emits. The 580EX ratio controls were set for 1:2 so that more light comes from the 420EX. The 420EX was placed on a bookcase and pointed directly at Woof-Woof. The 580EX was on the G9 hotshoe and pointed towards the ceiling; that is, the 580EX provided the (bounced) fill flash – similar to the first shot.


The result is a bit different from the first shot. Instead of flat, the lighting is now directional with fill. The amount of side vs bounce light can be controlled from the 580EX to suite one’s taste. The direction of the light is controlled by the position of the 420EX (slave).

Pretty simple, just don’t try it in Manual mode and expect ETTL or the ratios to work; however, the master will trigger the slave flash with the G9 in Manual mode.

(Both shots from unprocessed in-camera jpg without claiming great lighting or composition.)

Wednesday, December 12, 2007

G9 with Canon External Flash


Having a hotshoe for external flash is a great feature of the Canon G9. The G9 works well with Canon’s recent flashes and even some of the older ones. Just be aware that the G9 is small in comparison to some of these external flashes so the combination can be somewhat unwieldy. Also, the flash can cost almost as much as the G9! Here are some simplistic examples using the Canon 580EX on the G9.


Imagine that you come upon Woof-Woof in his favorite chair. Naturally, your G9 is in your hand and you quickly get the above shot using Program mode and ISO 80. The G9, being in Program mode with flash turned off, selected an exposure of 1/60 second at f3.2. As a result, the bright outdoor scene is overexposed and the indoor scene is underexposed. Flash is needed to bring up the interior lighting level. But if you use the built-in G9 flash, you can be certain of creating red-eye in poor Woof-Woof. You grab that big, expensive 580EX, fasten it to the G9 hotshoe and fire off another shoe before Woof-Woof knows what’s happening.


For this second shot, shown above, the G9, still in Program Mode but knowing that a Canon ETTL flash is in the hotshoe, again selected an exposure of 1/60 and f3.2. This is somewhat better but now it looks like a “flash” picture. Notice that the bright outdoor scene is still overexposed because the shutter speed and aperture have not changed. Determined, you remember about bounce flash, rotate the 580EX flash head towards the white ceiling and grab another shot.


Still in Program Mode, the G9 is convinced that 1/60 and f3.2 is the correct exposure; however, bouncing has softened the flash considerably as shown in the above photo. The outdoor scene is still overexposed. Suddenly you remember that a correct exposure for bright outdoors is given by the Sunny 16 rule as modified for the G9. Pretending to shoot the outdoor scene (only) through the window, sure enough: 1/500 and f5.6 is about right. You change the G9 to Manual Mode, set shutter speed to 1/500 and aperture to f5.6 and fire off a shot.


Finally, the indoor and outdoor scenes are properly exposed. Good dog, Woof-Woof!

Later you notice something odd: That last shot was not actually taken at 1/500 and f5.6 even though you know that those were the settings on the G9. That last shot was actually taken at 1/250 and f5.6. Checking the histogram, the outdoors is a little overexposed and the sky has a few blinking highlights. How could this have happened?

In Manual Mode with a Canon ETTL flash attached, the G9 will not allow shutter speeds faster than 1/250 second. If you set a faster shutter speed in Manual Mode, the speed will be reset to 1/250 when the shutter button is pressed. In fact, even if you turn the ETTL feature off, the G9 will reset from 1/500 to 1/250 shutter speed.

Even worse, ETTL was not in control of the 580EX when that last picture was taken. It was a fortunate coincidence that full 580EX power bounced from the ceiling was about right. ETTL flash control does not work when the Canon G9 is in Manual Mode. The output power of a Canon flash mounted on the G9 must be adjusted either on the G9 or on the flash when the G9 is in Manual Mode. I don’t like it but that’s the way it is -- same on all the G series cameras.

(Note: All pictures above were downsized from the unprocessed in-camera jpg for consistency. Some prefer a slightly overexposed outdoor view to preserve the effect. See the Strobist blog for many more variations on this idea.)

Monday, December 10, 2007

G9 and Sunny 16

My first camera, a Kodak Brownie, had no exposure controls. Years later, I had a fully manual camera with exposure controls but no light meter was included or needed. Instead of using a light meter, I simply followed the instructions included with every box of film. These instructions were the recommended camera settings for sunny or cloudy days, light shade, heavy shade, etc. Books and magazines also provided recommended exposures for various indoor and outdoor lighting scenes. Such exposure guides are still valid and useful.

A very useful point of reference for exposure is called the “Sunny 16 Rule”. The rule is that on sunny days where shadows are distinct, a correct exposure is f16 aperture when the shutter speed is set at 1/ISO second. For example, suppose the film (or digital sensor) has an ISO rating of 100. In bright sun, a correct exposure would be f16 at 1/100 second. If the ISO rating were 800, a correct exposure would be f16 at 1/800 second. Of course, given the nature of the f-stops and shutter speeds, there are many other equivalent combinations. For example, the exposures of f16 at 1/100 and f8 at 1/400 provide the same amount of light.

Going back to the Sunny 16 rule, if shadows are not so distinct, f11 might be a better aperture than f16. In deep shade or on overcast days where no shadows are created, f5.6 is recommended.

But the G9 does not have f16! The very nature of small sensor, small focal length cameras such as the G9 (not only the G9!) restrict the use of tiny apertures. Instead, we must adapt the G9 bright sun exposure to the Sunny 16 Rule. Actually, that exposure has already been given: f8 at 1/400 is equivalent to f16 at 100. The G9 does have f8.

I shoot my G9 at ISO 80 when possible. The reference exposure in strong sunlight would be f5.6 at 1/640 second based on the Sunny 16 Rule. However, it seems that f5.6 at 1/500 is often appropriate (even if not theoretically equivalent).

This has been a lot of numbers and there are many combinations but an understanding of the relationships between ISO rating, shutter speed and aperture is an essential part of being a photographer.

Hang on to this post or take notice of the blog labels because this will be used as a point of reference in future posts.

Saturday, December 8, 2007

G9 in Black and White

Black and white prints invoke art and visions from the past but there are many ways to get that artistic time travel effect from a digital camera. The Canon G9 (and a number of other cameras) includes a black-and-white mode so that black-and-white images can be made in-camera. This B/W picture was made in-camera with the G9 set for ISO 800. (To get to the black-and-white mode, press the Function button, scroll down to the My Colors settings and then scroll across to B/W.) A word of warning: When you set B/W mode on a digital camera, you will get a black-and-white image file – not a color image file. You may not be able to recover the color version of that picture. With the G9, by shooting in combined raw+jpg mode (a menu setting) with My Colors set to B/W, you’ll get a B/W jpg plus a raw image file. You’ll be able to process the raw file in color using any editor that will process Canon G9 raw files. I use Adobe Camera Raw in Photoshop CS3.

Even though it is easy to get a black-and-white picture in-camera, I normally don’t set the camera to B/W mode because it is so easy to convert a color image file to grayscale. This conversion can be done several ways: a menu option in many editors (including Photoshop), extreme desaturation, choosing or converting the the color channels, various plug-ins, etc. In the past, my practice has been to shoot in RAW, open in color and then use Fred Miranda’s B/W Pro plug-in. This inexpensive plug-in works well and also lets you add grain or convert to a duotone, tritone, etc. This picture represents my previous workflow. It was shot at ISO 80 to minimize noise, processed in raw as a color image and then converted to B/W in Fred Miranda’s photoshop plugin. Grain was added in the B/W Pro plug-in.

Considering the new features in ACR, I’ve been experimenting with grayscale conversion directly from raw while developing in ACR. An interesting aspect of this conversion is noise reduction. In film based photography, the grain structure of the negative became not only visible but a problem, especially with high ISO film. One solution for film grain was to treat that grain as an asset instead of a liability. With digital photography, there is no grain but amplification creates electronic noise from the pixels. In B/W conversions from digital, it has become fashionable to treat the noise similarly to grain. Therefore, if a digital file is to be converted to B/W, the processing does not include noise reduction. The B/W picture shown here is from the raw file accompanying the in-camera jpg (first picture in this post). That is, it was shot at ISO 800, but processed in raw without noise reduction and converted to B/W in ACR. No grain was added and it was easy to do.

Taking another variation in ACR conversion, this picture is from the same raw file as the second picture in this post (the Fred Miranda conversion). It was shot at ISO 80 so there was little noise/grain to work with. This time the conversion from raw was done entirely in ACR and grain was added in Photoshop (not a plugin). The ACR conversion settings were identical to those used for the ISO 800 picture above.


Of course, the in-camera B/W jpg can be edited. This picture is the edited version of the first picture in this post. That is, it was shot at ISO 800 with the G9 set for B/W mode. The only adjustments were Levels and Curves in Photoshop CS3.

All the pictures above were made from only two shots but the lighting was slightly different for each. Again, the G9 was set to save the raw file as well as a jpg file. Don’t be confused by the slight differences in lighting or the fact that I bumped the tripod slightly.

As a result of conducting these little experiments and organizing my thoughts to write about them, I’m going to change my processing methods. Whereas in the past I shot in raw and used the Fred Miranda plugin to convert the color image to grayscale, in the future I’ll be doing everything in ACR. I’m still going to use a low ISO if possible because the image quality was just better at low ISO. If I want to add grain to simulate grainy film, I’ll do that with a Photoshop filter.

There are only slight differences in these particular images. By clicking on the picture you can see larger versions but the most significant factor was lighting and my personal choices of settings in Photoshop's Levels, Curves and Smart Sharpening.

The point is: Good black-and-white shots can be made from color digital cameras and there are many ways of converting from color to black-and-white. Try a few variations and find a workflow that suits your preferences and tastes.

Tuesday, December 4, 2007

G9: The Black and White of It

The very first photographs were monochromatic. The first “pictures I took” were black-and-white – not for lack of color technology or for the sake of art but because black-and-white film and prints were cheap and readily available. In a strange but fortunate turn of events, those old black-and-white prints turned out to be archival whereas the color dyes of those years have faded away. In fact, if you have color prints stored away, better scan them while there is something to scan!

Try to imagine how different our world of photography would be today if the chemistry for color photography had been obvious, easy and archival. Would black-and-white photos even exist? Why would anyone make a black-and-white photograph if it were easier to make one in color? With digital photography, we are nearly to that point; however, the basis for those color prints is still light sensitivity and color dyes. In other words, black-and-white technology is still around even if we are less aware of it.

Today when someone makes a black-and-white print, they are probably doing it for the artistic effect or perhaps to invoke a sense of nostalgia. I believe that traditional black-and-white print making (meaning film, paper and chemicals hand-processed in a darkroom) is well on its way to becoming the domain of a fine arts and crafts cottage industry. Meanwhile, you and I can easily get black-and-white inkjet prints from our color digital cameras that are nearly - but not quite - indistinguishable from traditional prints to many, if not most, people. Even better, if your darkroom skills were similar to mine, you can probably get a better black-and-white print digitally than you ever dreamed of getting in the darkroom.

(This post is getting a bit long, stay tuned ...)

Sunday, December 2, 2007

Dressing up the G9

I've installed four G9 accessories designed and crafted by Richard Franiec: Ring, Grip, Thumb Rest and Hotshoe Cover. The Ring is purely esthetic – a simple black metal ring to replace the original black and silver one. The Grip and Thumb Rest really do improve handling. The Hotshoe Cover is for protection and to prevent snagging. These are all simple ideas that have been very well accomplished by Richard. They fit the G9 so well that you probably don’t notice the difference in this picture. Take a closer look. You can actually see all four accessories in this photo (but the thumb rest is just barely visible on the back of the G9). Click on the image for a larger view.

The wrist strap is obviously not from Richard. For a small camera like the G9, I prefer a wrist strap to a neck strap. This one is for a Canon camcorder. I used a similar one for years with my Canon G3. However, I did not pay close attention to the mounting bar on the G9 – it is smaller than the mount on the G3. Therefore I had to add a small metal ring to the G9 mounting bar. I do like that particular wrist strap but don’t make the same mistake I did if the metal ring bothers you (I don’t like the ring).

Richard’s products were first conceived for the Canon G7. In particular, the G7 Grip has been very popular. Although the G9 is naturally somewhat more ergonomically friendly, Richard’s G9 Grip (not the same as the G7 Grip) is an improvement. I’m glad I bought it; in fact, I’m glad I bought all four accessories.

The Grip and Thumb Rest are easily installed by following Richard’s detailed instructions. Double sided adhesive tape holds the Grip and Thumb Rest in place -- just peel off the backing and press. Be sure to wipe the camera surfaces with alcohol to remove any skin oil. Also, be sure to practice installing before removing the backing!
The Ring is a simple replacement: remove the Canon ring and install Richard’s Ring. You’ll have to look closely at Richard’s Ring to get the correct orientation but this is explained in his instructions. The Canon ring has a tiny white dot that matches a tiny black depression on the body. Richard’s Ring is all black; it is oriented correctly when the shortest mounting tab is at the top. Both the Canon ring and Richard’s Ring must be removed to install the auxiliary lens adapter. Sad to admit, but both of my rings now have a white smear on the shortest tab (not visible once the ring is installed).

The Hotshoe Cover is Richard’s latest product. It simply slides into place on the hotshoe. The large engraced letter “G” (for “Gordon”, I assume!) is a very nice touch and indicative of Richard's attention to detail in all his products.

For more information, contact Richard directly at: tecsol@comcast.net.

Friday, November 30, 2007

MyCanonG7.com – R.I.P

Siegfried Seierlein, founder of the notable website MyCanonG7.com and author of “Photography with the Canon PowerShot G7” (available from Lulu.com) has closed down MyCanonG7.com and the sister site PowerShotValley.com. Better said, Siegfried is reorganizing his site to better represent his own expanding photographic interests and not be limited to the Canon Powershot series. If you check MyCanonG7.com, you can read his announcement. Meanwhile, let’s be patient while we wait to see Siegfried’s new site.

Update: Siegfried's new site is available under the old address. It has changed overnight. Looks like we'll be able to observe his progress. Stay tuned to MyCanonG7.com.

Wednesday, November 28, 2007

G9: Processing that Raw File

One of the main reasons given for getting a Canon G9 is its capability to shoot in Raw mode. A Raw file is the digital equivalent of a film negative and there's a lot that can be done with it. But what software to use for the digital development of a raw image file?

Although Canon's editing software is bundled with the G9, there are other programs considered much better -- especially Adobe's Photoshop. The current version of Photoshop is "CS3". CS3 develops the raw image files with Adobe Camera Raw (ACR). ACR now has been updated to process Canon G9 Raw files.

Adobe Camera Raw can be intimidating. There's a new book that should be very helpful: "Camera Raw with Adobe Photoshop CS3" by Bruce Fraser and Jeff Schewe published by PeachPit Press. I got mine through Amazon. Here's a review of the book by Michael Reichmann.

Monday, November 26, 2007

G9 Pre-flash

In yesterday's post, I should have noted that there are problems when using inexpensive auxiliary optically triggered flashes with Canon main flashes in ETTL flash mode.

With optically triggered auxiliary flashes, it is important to know that Canon main flashes emit a "pre-flash" as part of the Canon ETTL system. Most auxiliary flashes are highly likely to be triggered by the pre-flash; this includes the in-camera flash of the G9. Therefore, it is essential to set the G9 for manual flash in order to properly trigger the auxiliary flash. My Quantaray MS-1 falls victim to the Canon pre-flash in every mode except for Manual.

Yesterday's post has been edited to include the above note.

Sunday, November 25, 2007

G9 and Flash


With winter coming on, we’re all likely to be taking more indoor pictures. Here’s a scenario that will be repeated many times this winter: Someone comes upon a nice indoor scene and decides to take a photo. Up comes the digicam, the shutter button is pressed, the camera decides that flash is necessary and the resulting picture is not at all what was expected. In the days of film, the photographer would not have known how the picture turned out until it was too late!

There are several things to be learned from the photo above. First of all, don’t stand directly in front of a reflective surface when using on-camera flash. Second, try not to even use on-camera flash. Third, don’t overpower the existing light with the flash. The G9 provides several ways to work around these difficulties.

The G9 has a hot shoe for external flash and works well with the Canon ETTL flash system except that ETTL does not work in the G9 Manual mode. Some Canon flashes and accessories cost nearly as much as the G9! Fortunately, the G9 also works with other flashes – even very inexpensive flashes.

Cowardly Disclaimer: Recent Canon cameras can be damaged by high flash trigger voltage. This is also true of many cameras. Before using older flashes with your new G9, check for compatibility. Here’s one reference: http://www.botzilla.com/photo/strobeVolts.html

I have personally used the Canon 380EX, 420EX, 580EX, a Nikon SB-24 and a Nikon SB-28 on my Canon G3 and Canon G9.

To capture this particular fireplace scene, moving to one side was easy enough. but how to turn down the flash and how to get the flash off of the camera? More importantly, how to do this without spending a lot of money?

To more accurately record the fireplace scene, I placed my G9 in manual mode at ISO 80, 1/30 second, f4 with the in-camera flash turned on but with flash power minimized. I moved slightly to one side so that the in-camera flash would not reflect from the fireplace. A small auxiliary flash with optical trigger was placed on a near-by table and the table moved closer to the fireplace. A sheet of common copy paper was placed between the flash and the small statue to reduce and diffuse its light. These and other techniques are explained at http://www.strobist.blogspot.com/.

My auxiliary flash, a Quantaray MS-1, cost about $15 several years ago and is still available. The MS-1 is not very powerful, is slow to recycle and does not trigger well in sunlight; however, it has served me well on many occasions. It is small and fits neatly in the small bag with my G9 equipment.

With optically triggered auxiliary flashes, it is important to know that Canon main flashes emit a "pre-flash" as part of the Canon ETTL system. Most auxiliary flashes are highly likely to be triggered by the pre-flash; this includes the in-camera flash of the G9. Therefore, it is essential to set the G9 for manual flash in order to properly trigger the auxiliary flash. My Quantaray MS-1 falls victim to the Canon pre-flash in every mode except for Manual.

Now, I have to confess that those manual flash settings, flash location and even the placement of the copy paper diffuser did not all come together on the first attempt (but with practice I’m getting faster). The point is, the G9 is a very versatile camera for learning to use manual flash. Also, it is not essential to purchase expensive external flash equipment to improve your G9 pictures with flash.

Here is an excellent reference for learning the Canon flash system and other flashes on Canon cameras. Much of this information applies to the G9 as well.

Wednesday, November 21, 2007

G9 and Closeups


A telephoto lens set at the minimum focus distance is the opposite extreme from the wide angle hyperfocal settings discussed previously. To get this picture, the G9 was set at full telephoto: 44mm (usually referred to as 210mm equivalent in terms of 35mm film). The aperture was f8 and the matching shutter speed was 1/160 sec for ISO 80 in sunlight. The G9 was about two feet away from the ring – almost, but not quite the minimum focus distance at full telephoto. In fact, I used the “macro” setting to focus on the ring.

Under these conditions, the theoretical depth of field is about ¾ inch. That is, only a distance of about ¾ inch into the picture appears to be sharply focused. The horizontal ring in the picture is about 4 inches in diameter and all of it is not in focus. Therefore, regardless of how the calculation is done, it is very obvious that the depth of field is on the order of one inch.

The G9 and similar small sensor cameras are sometimes said to be diffraction limited and those disparaging it as such will disapprove of using the f8 aperture. Don’t be afraid to use f8 – it’s OK.

Besides, at f5.6 the depth of field would only have been about ½ inch!

Saturday, November 17, 2007

G9 and Hyperfocal Focusing

The small point-and-shoot “digicams” so popular today have a significant depth of field. That is, for a given scene, the distance from the camera that is acceptably in focus is much more than might be expected with, say, a 35mm film camera. In fact, sometimes it seems that everything is in focus. The G9 is no exception to this rule.

At first thought, having everything in focus seems preferable although there can be good reasons for intentionally producing out-of-focus areas. In particular, in landscape photography the camera is often set to produce pictures having deep depth of field. Typically, this is done by setting a small aperture (large f-stop number) such as f22.

The G9 does not have apertures of f22; in fact, the smallest aperture is f8. The G9 has been criticized by some for this apparent lack of smaller apertures but f8 is more than adequate for depth of field. If smaller apertures are needed for exposure then the G9’s internal 3x neutral density filter should be turned on.

In some of my early tests, I noticed that the G9 automatically selected focus distances of about 25 feet whereas the main subject was easily 300 feet away. When I manually changed to infinity focus, there was no obvious change in the picture. How could this be?

The key phrase to understanding this phenomena is hyperfocal distance. Briefly, when the focus is set to the hyperfocal distance then everything from half that distance to infinity will be in acceptable focus. Remember that old camera that did not require (or allow for) focusing? It was built with the lens set at the hyperfocal distance. The focusing instructions for my old Kodak Brownie camera were simply to be certain that the subject was at least six feet away (as I recall).

Some love to debate the exact nature and mathematics of depth-of-field, focusing, focal lengths, enlargements, circle of confusion, etc. An excellent source of information, including computer programs, is http://www.dofmaster.com/. For now, let’s just consider that the depth of field depends on the focal length of the lens, the distance that the lens is actually focused at and the aperture.

For the G9 widest angle zoom setting, the focal length is 7.4mm. At 7.4mm with f4 aperture, the hyperfocal distance is about 8 feet. This means that with the camera set for 8 feet everything from about 4 feet to infinity is in focus! No wonder I was confused! For my scene, automatic focusing was selecting about 25 feet – which was actually OK even though the main subject was much farther away.

At the other extreme, the G9 telephoto zoom is 44.4mm. At 44.4mm and f5.6, the hyperfocal distance is nearly 200 feet; everything from 100 feet to infinity is in focus. Therefore, as is known from experience, focusing is much more critical when using telephoto lenses.

So when using the automatic focusing modes of the G9, be aware that automatic focus settings rely on the principle of depth-of-field and make use of hyperfocal distance.

Tuesday, November 13, 2007

The Blue Beetle


At the tender age of 14, I made my last and favorite plastic model car, the "Blue Beetle", knowing that some day soon I'd have my own real hotrod. Alas, that day never came -- at least not yet. The Blue Beetle survived Hurricane Camille and quite a few years tucked away in a shoe box before being displayed in my study.

With the new G9 in hand and looking for a subject, the ol' Beetle caught my eye and I grabbed a few shots. Those shots were OK -- the G9 worked -- but the Beetle deserved more. A few days later with a bag of sand spread on a worktable, a diffuser made from a frosted light panel and two strobes gelled with CTO filters, the Blue Beetle is preserved for posterity.

The G9 settings were ISO 80, 1/250 sec, F8, shot in RAW mode. The image file was processed in Adobe Camera Raw, then Photoshop CS3 with no noise reduction. Sharpening was done using PK Sharpener. The Blue Beetle was then slightly cropped to fit into a 12x18 inch print and printed on an Epson 2200 printer on Innova F Type Gloss paper.

I like the result.


Thursday, November 8, 2007

G9: Av and Tv Peculiarities

When the G9 is placed in Aperture Priority mode (Av), the internal logic for selecting the necessary matching shutter speed will not permit shutter speeds longer than one second. If a slower shutter speed is actually required for proper exposure, the LCD will display the “1” in red to indicate that there is a problem. However, the G9 certainly has the ability to use slow shutter speeds.

By using shutter speed priority (Tv), the shutter opening duration can be set for as long as 15 seconds. In Tv mode, if the necessary matching aperture value is not available, then the aperture value that is selected is displayed in red on the LCD.

You may not notice the red aperture or shutter speed display unless you are in the habit of pressing the shutter button halfway and holding it while you check the LCD display.

What are the limiting shutter speeds and apertures of the G9? These limits are usually as: shutter speeds from 15 seconds to 1/2500 second and apertures from F2.8 to F8.0. This is true but some combinations of shutter speed and aperture are not available at all and other combinations are only available under certain conditions.

If you have a G9, you’ve probably already noticed that the aperture range at the full telephoto zoom position is not F2.8 to F8; it is F4.8 to F8. This is a fairly typical characteristic of many zoom lenses and not only Canon products.

Imagine a hole that must be closed. A small hole can be closed more quickly than a large hole. When the G9 is set for an aperture of F2.8, the fastest shutter speed is not 1/2500 second; it is 1/1600 second. In fact, to get a shutter speed of 1/2500 second, the aperture must be nearly F8 if the zoom is at maximum telephoto.

As a means of working around these limits, a “Safety Shift” can be set in the G9 menu. With Safety Shift turned on, the aperture is automatically adjusted, if necessary, even when the G9 is in Av mode. Likewise, with Safety Shift on, the shutter speed will be automatically adjusted, if necessary, even when the G9 is in Tv mode. At first, I didn’t like the idea of the Safety Shift but, more recently, I’ve turned it on. Safety Shift does not affect Manual Exposure mode.

I don’t like the 1 second slow speed limit in Av mode. This has caused me some problems, especially when expecting to get three shots automatically exposure bracketed (AEB) for combining into a High Dynamic Range image. In these cases, I knew that the exposures would be long and had mounted the camera on a tripod. I wanted the same aperture for all three images but, instead of three, got only two different exposures – and sometimes only one! Manual mode is the answer but, unfortunately, auto exposure bracketing does not work in manual mode. This means that the camera must be touched – very carefully! -- between exposures.

These problems, quirks, bugs – whatever you choose to call them -- are not new to the G9. The G3 and, I assume, all the G Series cameras are very similar. As with all cameras, to get the most out of the G9, we have to learn its peculiarities.


Tuesday, November 6, 2007

Comparison of G3 and G9 ISO 400 RAW

One of my reasons for getting the Canon G9 when I already had a G3 was to get a higher useable ISO rating. The G3 has a maximum ISO 400 whereas the G9 goes up to ISO1600. Much has been made of the fact that the G9, having 12 megapixels, necessarily has smaller pixels than the G3 with its 4 megapixels. Small pixels generally mean more noise. Even so, it seemed likely that the G9 might be more useable at, say, ISO 400, than the G3. I decided that if the G9 produced reasonably good 8x10 prints at ISO 400 – even if special noise reduction was required -- then it would be a keeper. This turns out to be true and I’m keeping the G9.

The picture below is a direct comparison of the G3 and G9 at ISO 400. Once again, it is important to know the “rules” of the comparison. The scene is the same as in the previous post. The G3 and G9 were set at ISO 400, RAW mode and aperture priority (Av). The cameras were placed, one at a time, on a tripod; the tripod was not moved. RAW files were processed in Adobe Camera Raw (ACR) with no adjustments; that is, all tonal adjustments, sharpening, noise reduction, etc were set to zero. (Keep this in mind when looking at the crops.) Even so, there are some important differences in the basic image files. The G3 image is naturally 2272x1704 pixels; the G9 is 4000x3000. The G3 lens was at its widest, 7.2mm focal length but the G9 widest focal length is 7.4mm. Even though the tripod did not move, the cameras were not precisely oriented. The G3 exposure was 1/1250 sec at f4.5 but the G9 selected 1/640 only about five minutes later. Rather than manually adjust these automatic exposures, I decided to accept them; the histograms look about the same.

Again referring to the previous post for the complete view, the sample below is from the bottom towards the middle.


On a 100% pixel view, the G9 image is larger. How should this be resolved? I decided to reduce the G9 image to the exact same number of pixels as the G3 (G3 and G9 images have the same aspect ratio). The above is a 100% crop showing 400x400 pixels (click on the picture for a larger view) of the (essentially) unprocessed RAW images. Clearly the G9 crop has less noise and shows more detail.

The above area was well exposed; let’s examine another sample from the shadows. The crop below compares the G3 and G9 at the middle right hand side of the full image. The rules of comparison are the same.


Once again, it is easy to prefer the G9 image. Perhaps the most obvious improvement of the G9 as compared to the G3 image lies in the amount of visible detail. Notice that the G3 sky shows more noise. Interestingly, the amount of noise in the shadows seems roughly equal but, again, the G9 image has much better detail and gives the impression of less noise.

Remember, these were comparisons of ISO 400 RAW files as exposed by the G3 and G9 in Av mode. The samples shown were not adjusted for levels, curves, saturation, sharpness, noise reduction, etc. The G9 samples were downsized to match the G3 samples. Obviously, each image could be improved with proper post processing.

My conclusion is that I’d prefer to use the G9 at ISO 400 instead of the G3 at ISO 400 – even though the G9 pixels are smaller.


Sunday, November 4, 2007

Comparison: G3, G9, S5, SD800, 20D


Suppose you come upon a well lit scene and simply raise your camera to your eye and get a snapshot. Which camera would be best? I gathered a Canon SD800IS, an S5IS and a 20D along with my G3 and G9 and attempted to make a comparison.

Once again, I’m impressed by the “rules” that must be made up for the comparison game. This time, the rules are: no special exposure, no special focusing, use low ISO setting, no tripod, compare the in-camera jpg images. Although all the comparative images came out OK, I probably should have used a tripod just to eliminate that variable. Also, because it is my normal practice, I shot in Aperture Priority (Av) mode.

My original intention was to post the various images and elaborate on the differences. As I viewed the various shots on my monitor, I realized that they were all the same. Well, almost the same, anyway. Especially at full screen size. I printed them on an Epson 2200 printer – the same. I printed them on a Canon i9000 printer – the same (but different from the Epson). Different papers – the same (but different paper to paper).

Of course, when I processed the RAW files (couldn’t resist getting RAW from the G3, G9 and 20D) then those images should be different from the in-camera jpgs. And they were. The ones that I over-exposed in Adobe Camera Raw (ACR) were too bright. The ones that I over-saturated or over-sharpened were, well, over-saturated or over-sharpened. I combined an overexposure and underexposure in an attempt to get more detail but didn’t like it. All in all, for this particular scene and for the first pass attempts in ACR processing, the in-camera jpgs were fine – and that goes for all the cameras.

The picture posted above is from a Canon S5 IS. The G3, G9 and SD800IS look very similar – and why not? These images are all “designed” by Canon’s marketing teams and engineers (I’m making this all up but you get the idea) to be pleasing to the purchaser – on average. Realistically, you have to expect the in-camera jpg images from these Canon products to be very similar.

On the other hand, the 20D image was very different (remember, we’re talking about an in-camera jpg). The 20D has a CMOS sensor instead of the CCD used in the G3, G9, SD800 and S5. The 20D, a DSLR, is targeted at a different market. The obvious difference that I observed is more related to color saturation than anything else. That is, the 20D image was less saturated; however, this is actually a consequence of the 20D settings that I had personally established.

I tried to be objective. I waited days between comparisons. I showed the prints to quite a few people. These images, whether viewed on screen or printed to 8x10 are all essentially the same. I’ll venture to say that, based on these images alone, almost anyone would be happy with any of the cameras that I “tested”. Strangely enough, most people preferred the over-saturated in-camera jpgs of the digicams to the more realistic 20D version. In fact, I have to admit that my own preferences (based on processing the RAW files) look more like the digicam in-camera jpg than the more realistic 20D in-camera jpg. No doubt those preferences are a sign of the times.

My conclusion? For front-lit simple landscapes, any of the higher end Canon digicams produce about the same image. A more realistic image is made by the 20D DSLR. All produce an acceptable image when printed at 8x10 inches.

My personal choice? I’ve learned enough about the G9 to know that if image quality, especially enlarged prints, is the criteria, then I’m going to use the 20D. At the same time, for these particular images, I’ll give the edge, albeit a slight one, to the G9. Whether from the in-camera jpg or a processed RAW file, I consistently picked the G9 images as my favorites. I attempted to forget, to be objective, etc., etc. but the G9 just takes good pictures.

Monday, October 29, 2007

G9: Noise in the Garden

Any self-respecting Pixel Peeper will take one look at this 100% crop and cry out “Noise!”. (You’ll probably have to click on the image to see a larger version and get the full effect.) On learning that the image is from the Canon G9, the Peeker will further exclaim, “I knew it. Small pixels are noisy. The G9 has too many pixels on a small sensor and therefore each pixel must be very small. No wonder the image is noisy; I predicted it.”

All of the above (explanation, that is) seems to be true. The Canon G9 does pack a lot (12,000,000) of pixels onto a small sensor. Therefore, those pixels are small and, all other things being equal, smaller pixels produce more noise. I’m not a camera designer, a chip designer or even an electronics engineer but I’ve come to accept these facts as being in accord with the “Laws of Nature” and, even more convincingly, Internet Lore.

Besides, the detailed tests and reviews of the G9 are published and it produces noisy images. No doubt about it: G9 images are noisy and the noise gets worse as the ISO setting increases. The full scene from which the noisy crop was taken is shown below (but reduced in size to 1024x768, high quality jpg compression).


Two of the main reasons that I bought the G9 were that I wanted higher resolution and a usable higher ISO than I could get from my Canon G3. The G3 was limited to 4MP and ISO400; however, the ISO400 was not particularly usable. My hope was that the G9 would have good quality at ISO400.

I’ve seen the reviews and read the comments in the discussion forums: G9 = Noise. I took a few shots at high ISO and peeked at the pixels. Yes, even my own G9 is noisy. Now, could I find a way to work with or around that noise?

Of course, I had to generate some images and conduct my own tests. Here’s the set up and procedure:
- found a scene with both bright and dark areas
- G9 on tripod
- Set for RAW + jpg (hoping to get improvements in Photoshop)
- Set Av mode
- Set 2 sec shutter delay (wish the G9 had a remote)
- Pictures at ISO 80, 100, 200, 400, 800, 1600

The above pictures were taken at ISO1600 and are direct from the in-camera jpg. Surprised? The second lesson learned is that the high ISO images can be very usable so long as the image is small. What good is a small image? Well, uh, the Internet...

The first lesson learned (see, the paragraph above has the second …) is that testing cameras is not at all straightforward. For example, what is the correct exposure for all these varying ISO speeds? I decided to use Av mode but that decision also means that the test results vary with the G9’s judgement of exposure. (Shutter speeds selected by the Av mode did not exactly track ISO.) Is the in-camera jpg that is embedded in the RAW file the same as a jpg made without RAW? (Seems to be.) How should the data be presented?

Entire scenes are shown in this post as 1024x768 pixels. The in-camera jpg images are presented as-is and 100% with no post processing whatsoever except for cropping to emphasize the noise.

The ISO 80 crop from in-camera jpg

The ISO 800 crop from in-camera jpg


The ISO 1600 crop from in-camera jpg is the first picture show in this post.

I’ve already admitted to peeking at a few pixels myself. I didn’t care for the higher ISO images from the in-camera jpg. In fact, I didn’t particularly like the ISO 80 image from in-camera jpg – not that it was noisy, it just doesn’t look good to me. Time to break out Photoshop CS3 and process those RAW files.

Interestingly, Adobe Camera RAW (ACR) did not automatically change the exposure of the RAW files. Of course, I did tinker with the settings myself. I wanted to minimize noise and get a picture more to my liking as well.

In the G9 review on Digital Photography Review, I was impressed by the noise reduction of an ISO 400 image with ACR 4.3 (and by noting that ACR 4.3 is being Beta tested; the current version is 4.2 and it only approximately fits the G9). The ACR settings really caught my eye: luminance at 0 and chroma at maximum. I’d have never thought to use these extremes but it seemed to help the DPReview images. Of course, I don’t have the 4.3 Beta but I tried both extremes and the middle settings for luminance and chroma noise reduction in ACR 4.2. To my eye, there was no effect; perhaps this will change in version 4.3.

I use Photokit Sharpener from Pixel Genius for sharpening. PK Sharpener uses a three step process: 1) capture sharpening, 2) creative sharpening and 3) output sharpening. Capture sharpening is user selected according to camera resolution and user taste, creative sharpening is entirely user taste and output sharpening varies with file size, output device (screen, printer, etc.) and user taste.

The most recent versions of Photoshop include sharpening in ACR. The ACR sharpening parameters are on the Detail screen along with the noise reduction parameters. I’ve been wanting to try ACR sharpening as a sort of “capture” sharpening. Strangely enough, to me anyway, when ACR sharpening is used, the luminance and chroma settings come into play. I suppose ACR is designed this way but, if so, it was not obvious to me. After much trial-and-error, it seemed to me that settings of 50, 0.5, 20, 80, 50, 50 for the ACR Details page reduced noise nicely but not entirely. (You’ll have to check the Details page to see what I mean by these numbers.)

I still used PK Sharpener for capture sharpening (incorporated into the trial and error above).

Now for more noise reduction using Neat Image. I made my own profiles using the Neat Image calibration targets and applied Neat Image at 35% strength. Pretty simple and took me a lot less time and experimenting.

By this point, the noise level had dropped quite a bit. I finished up the post processing by tweaking levels, curves and saturation. Here’s the 100% illustrative crop from the ISO 800 image:

Notice that the noise, even pixel peeked, is not too bad. On top of that, the details look better to me. And here’s the final, full image from the ISO 800 RAW file after post processing.


I even like this one more than the ISO 80 image from the in-camera jpg but that’s a matter of taste. I will say that the colors, especially the fence, are more accurate (if somewhat saturated). It made a nice print.

So, I think my G9 has very good potential at ISO 400 and even 800 under the right conditions and when processed from RAW. The requirement to process from RAW is not a problem to me; much of that processing can be done semi-automatically using Photoshop Actions.

But, sad to admit, I gave up on the ISO 1600 file. Although it could be improved, I haven’t got it quite right – yet.

Friday, October 26, 2007

DPReview Tests the G9

Digital Photography Review has today posted an extensive review and report on the Canon G9. They also made comparisons to their previous tests of the Canon G7.

G3 and G9: Side by Side

Here is a visual comparison of the G3 and G9. The G3 is obviously a bit larger. The normally protruding lens and hand grip makes the G3 seem even larger. Open up the articulated display panel and the G3 expands some more. However, neither are particularly large cameras. Most telling about the size: Replacing the G3 with the G9 in my Lowepro Nova Mini camera bag definitely freed up some space (promptly filled with other stuff!).


Fitted with optional lens adapters for attaching filters, wide angle or tele converters.


The Canon lens adapters.

Tuesday, October 23, 2007

Welcome to MyCanonG7 Readers!

Some of you are finding your way here through MyCanonG7 and the articles there on the Canon G3 and G9. Welcome to LightDescription! If you don't already know about the wealth of information on the Canon G7 that is at MyCanonG7, then be sure to check it out.

When Siegfried Seierlein offered to make a link from his MyCanonG7 site to LightDescription, I had just begun to write about my new Canon G9. Those posts are here and here with some posts on the G3 here and here (or just click on some of the labels).

Listed below are websites that have posted some of the more comprehensive reviews and (sometimes) tests of the Canon G9.

Popular Photography magazine http://www.popphoto.com/cameras/4599/camera-test-canon-powershot-g9.html

The Online Photographer
http://theonlinephotographer.typepad.com/the_online_photographer/2007/09/canon-g9-revi-1.html

PhotographyBlog.com
http://www.photographyblog.com/reviews_canon_powershot_g9.php

Photography-on-the-net
http://photography-on-the.net/forum/forumdisplay.php?f=17
(Although not really tests or reviews, this is a discussion forum specifically for the Canon G series.)

... and don’t forget to check the official Canon G9 site -- the operating manuals for the G9 are now available for downloading! In the USA, it is
http://www.usa.canon.com/consumer/controller?act=ModelInfoAct&fcategoryid=144&modelid=15669
but you should be able to find your way to the G9 site through the main Canon site http://www.canon.com.

You are welcome to make comments; however, comments are moderated and therefore will not show up right away.

Friday, October 19, 2007

But first, a word about the G3


As noted previously in this blog and also just a few days ago, I’ve used a Canon G3 for about five years and it has served me well. I’ve written about my G3 on PowerShotValley and have pictures from it on my HornerBuck website. It’s a good camera: 4 solid megapixels, 4X zoom, ISO from 50 to 400, hot shoe for external flash, some accessory lenses and filters and has a RAW capture mode.

One of the G3 features that I really came to like and use is the articulated LCD screen. This moveable, rotatable and flipable display is extremely handy for getting closeups -- especially macro shots. It can be flipped around completely for composing self portraits. On the downside, the screen is a bit small and difficult to read in bright sunlight.

Although the G3 had a remote, mine quickly went on the blink. Eventually I bought a cheap generic replacement that works as well as the original; that is, not very well. The zoom is not very wide on the short end. The 400 ISO mode is very noisy. External flash works great with Canon ETTL flashes in the G3’s automated modes but ETTL flash does not work if the G3 is set for manual exposure. Although not a large camera, the G3 certainly is not a pocket camera but it is very “grippable”.

Over the years, I learned how to manage and work with the G3. I virtually always shot in RAW mode and processed the RAW files in Photoshop’s Adobe Camera RAW. I avoided ISO 400 if at all possible and applied noise reduction (Neat Image with my own profiles) for every ISO except 50. I used PK Sharpener from Pixel Genius to accomplish capture sharpening, creative sharpening and then final sharpening for prints. When making prints larger than 8x10 or cropping, I up-rezzed in Adobe Camera RAW. I learned to stitch images to gain pixels or simulate the wide angle lens that the G3 lacked. It was all great fun and very educational.

My G3 works just as well as ever but I was beginning to realize that better cameras were readily available.

Wednesday, October 17, 2007

Canon G9

Only a few months ago, I realized that, with the possible exception of flash, my equipment was not the limiting factor in my photographic efforts. I do have quite a bit of equipment and although much of it is old and none of it is “high end”, equipment is not my problem. I resolved to study lighting, especially with small strobe flashes, and to somehow become more creative.

The Strobist is helping me a lot with lighting and flash; he’s even helped with creativity in the process. I’ve added some flash equipment and it’s fun to experiment with lighting. The camera doesn’t particularly matter as long as it can shoot in manual mode and link somehow with a couple of external flashes. I’ve used both a Canon 20D and G3 to study and experiment with lighting.

On the other hand, my Canon G3 was a bit long in the tooth. In the five years since I got it, Canon’s G Series of cameras had progressed from the G3 (there was also a G1 and G2) to the G5, G6 and G7. The G7 was completely unexpected because Canon was said to have dropped the G Series entirely. When the G7 came along, I was interested but then discovered that the G7 did not have RAW capture. The G7 is a very nice looking camera with many devotees (see MyCanonG7.com) but omitting RAW capture actually caused an uproar within the Internet crowd. I was among those who signed petitions of complaint.

Canon responded with the G9. (There are various stories about why Canon skipped G4 and G8 but who really knows?) The G9 has RAW! My bluff was called and I responded. I’ve had a G9 for about a week now and am really enjoying learning to use it. Much of the logic and use are somewhat familiar to me from my experience with the G3 and 20D. The G9 is very similar in appearance to the G7 and has essentially the same features.

So for the next several weeks I plan to tinker with and write about my G9.