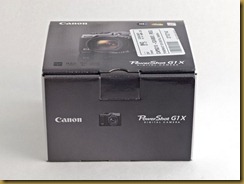
 One of the most popular posts on LightDescription has been “Using Your New G12” so it is natural to make a similar post for the G1X. In fact, the initial tips for the G1X are very similar to those for the G12 in many ways and much of this applies to other digital cameras, particularly the Canon PowerShots.
I received my G1X on February 29 and immediately began posting about it. Those experiences (and prior wishes and expectations) have been posted previously.
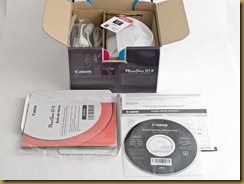
With your own G1X box open, immediately find the battery and charger. Put the battery in the charger and plug in the charger. Although the battery probably already has a slight charge, begin the charging process. You’ll probably be too impatient to let the battery completely charge (I was) but go ahead and add a few electrons now. Full recharge might take a couple of hours.
 Unlike previous G series cameras, there is no printed instruction manual for the G1X; however, there is a printed “Getting Started” guide. The instruction manual is in .pdf format on the CD that contains the Canon software. Install the software while electrons are being added to the battery. If you already have previous versions of the Canon software, Canon recommends that you install the current version over the older version. If you are using Windows XP, be sure to have installed all the available updates (Service Pack 3). Remember to restart the computer. (You really don’t need the Canon software to use the G1X; I confess to not actually installing the software.)
If you have experience with older G series cameras, take a quick look at the G1X User Guide Notes in this blog: Part 1, Part 2, Part 3. These notes are my understanding of major differences between the G1X and G12.
The G1X doesn’t come with a memory card so you’ll have to purchase one separately. I’m currently using a Class 10 Transcend 16GB SDHC card. It seems that almost anything memory card will do but Canon recommends Class 6 or higher. Slower cards will work fine but, uh, slower -- especially while you wait impatiently for all those bits to be transferred to your computer. If your new memory card came with special software already stored, be sure to copy that software to your computer’s hard drive or a CD before reformatting the memory card.
 Flip the G1X upside down to get to the battery and card door on the bottom. Slide the catch over and then let the door pop up. Insert the memory card so you don’t lose it while you read the Quick Start guide and wait for the battery to be charged. The memory card and battery can be inserted into the G12 only when properly oriented.
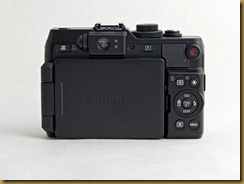
 Get accustomed to the G1X and the layout of its controls. Take a look through the viewfinder and, if necessary, adjust the viewfinder optics to suit your vision. Pull out that nice articulated screen, gently flip it around and push it back onto the camera body.
Now that approximately 5 electrons have been added to the battery, go ahead and put it into the G1X. Next, flip the G1X right side up and turn it on with the small button on the top of the camera. In using the G1X, you will probably discover that it is easy to accidentally push the wrong button or dial on the back of the camera. You’ll get better at this but it is a problem. Try putting your thumb firmly on the thumb pad next to the red “record” (video) button.
Reformat the memory card using the G1X menu system. The Menu button is on the back of the camera on the lower right hand side. Push it and use the large dial to cycle through the menu commands in amazement until you come to the one that says Format (it’s under the “tools” tab). Just think, soon you will know the meaning of all those options! Push the center button of the large dial on the back of the camera to activate the Format option.
Ready to take a picture (I bet you’ve really already taken one by now)? While you get the feel of the G1X, put it in completely automatic mode. This means the green oval “AUTO” on the small top dial. Rotate the dial to align the green AUTO label with the white bar. Take your first picture with the G1X.
Did you remember to use the “half press” shutter button technique? This is one of the most useful and important techniques for modern cameras because it reduces the effective shutter lag while confirming focus. In fact, I revert to thinking “Focus” as I do this. Push the shutter button gently and you’ll notice that the “feel” changes as the button goes about halfway down. You’ll probably hear a slight beep and see a green rectangle light up on the LCD. Hold that position momentarily then finish pushing the shutter button to get the picture. The “half press” technique is explained on page 18 of the Getting Started guide.
To do list:
Finish charging the battery.
Set the date and time using the menu system (page 14 of the Getting Started guide).
Get a second battery. The G1X battery is a good one but you’ll want a spare. I use the cheaper clone and get an adapter for charging in the car. Charge and test the clone as soon as you get it.
Get a wrist strap. I use a Gordy strap but there are many others to choose from.
Get a bag. It seems that most G series users opt for a small camera bag that can be mounted on a belt but I use a medium size shoulder bag to accommodate my “stuff”.
Get a real flash. The built-in flash is useful but not very powerful. Such built-ins often cause harsh shadows and red eye. A small, nice external flash is Canon’s 270EX (although I use a larger Canon flash on-camera and favor off-camera flash).
To connect the G1X directly to your HD TV, you need the HCMI cable HTC-100 (or a clone). This cable has a small connector matching the camera receptacle.
Eventually, you may want the FA-DC58C filter adapter. You’ll need the filter adapter to add screw on close-up lenses such as the Canon 250D. The little LH-DC70 lens hood adds a nice look and is probably useful as well.
This blog is full of my trials and errors with the G9 and G12. Many of those experiences will also apply to the G1X (I think). Use the labels on the left hand side of the blog or the search button to find topics of interest.
Enjoy your G1X! Stay tuned and share my experiences with the G1X.
No comments:
Post a Comment